Time Tracking
Description
Track your time with the simple to use Time application. It's free for unlimited projects, users, and entries ready to use right where your projects are. Forgetting to start tracking time is no problem as you can easily edit it later on.
- One-click - start, pause, and resume
- See who is working now instantly
- Access to timers from anywhere in a project
- Export to Excel
- Use the Time Widget to see the latest time tasks your team is working on
- Get updates about the latest entries by email and in the new Notifications page
Update
We integrated time tracking with Tasks and Issue tracker.
Adding/Removing the Time add-on
Please see this documentation article for a guide on installing/removing add-ons and managing user access.
How to access Time Tracking Application
You can access the Time application from your Dashboard, by clicking into a project (1):
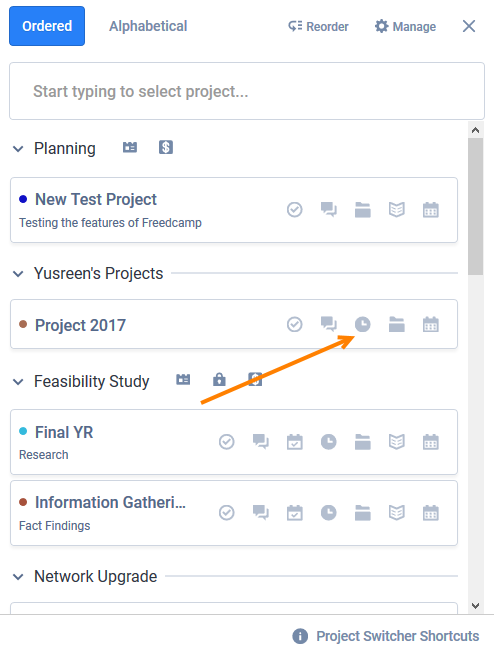
Once you have selected your project, you will see the Time app (2) alongside with your other applications that you have enabled for this project (3):
Using Time Tracking
Add a Time Record
You can add a Time Record by clicking on “Add Time Record” button (1), entering the details in the text boxes (2) and click on “Add Time Record” button (3) as below:
![]()
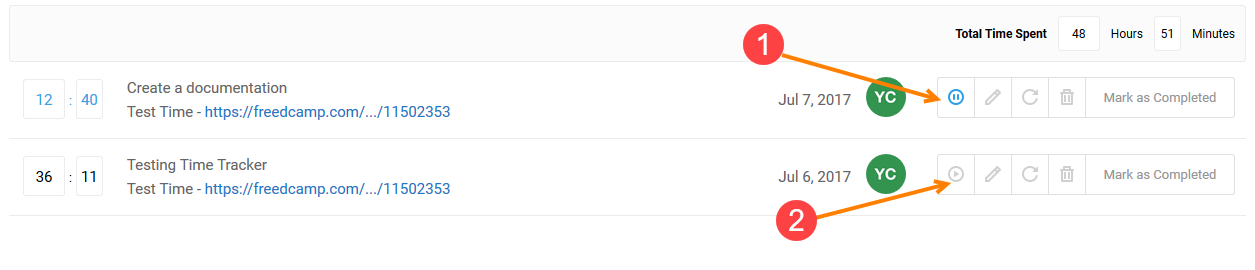
Start and Pause Time Recorder
You can start and pause a Time Record by clicking on the same “Start Working” button (1) and (2) as below:
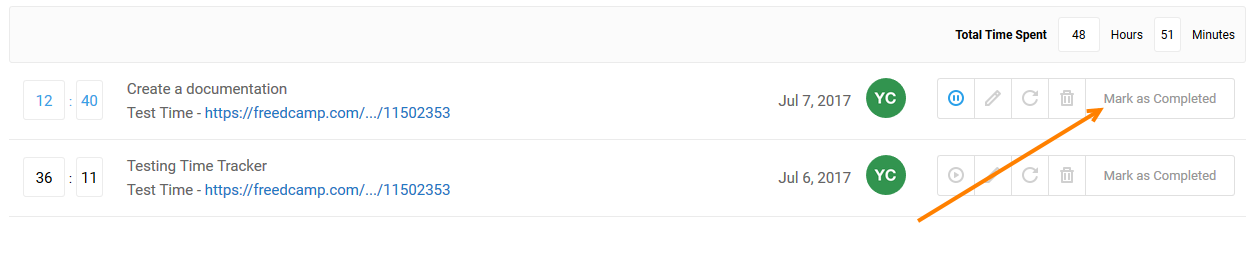
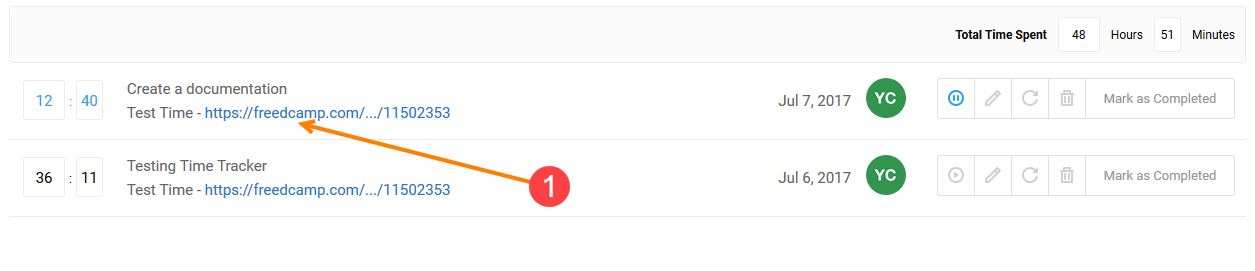
Mark Time Record as Completed
When you have completed a Time Record, you simply can click on the tab “Complete” (1):
Bulk Mark Time Records as Completed
If you mark Time Records as completed it will significantly improve the application performance. Please filter records you want to complete and then use "Mark Filtered Records as Completed" in the application cogwheel menu as shown below:
Delete a Time Record
Click on the tab “Delete” (2) to delete a Time Record:
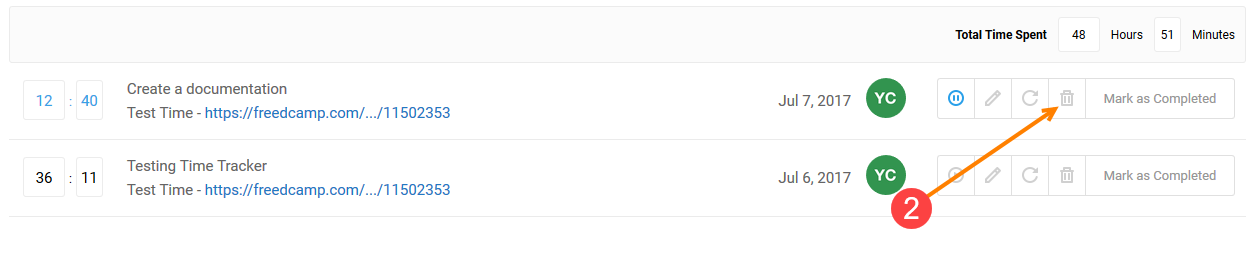
Edit a Time Record
Click on the tab “Edit” (3) to edit your Time Record:

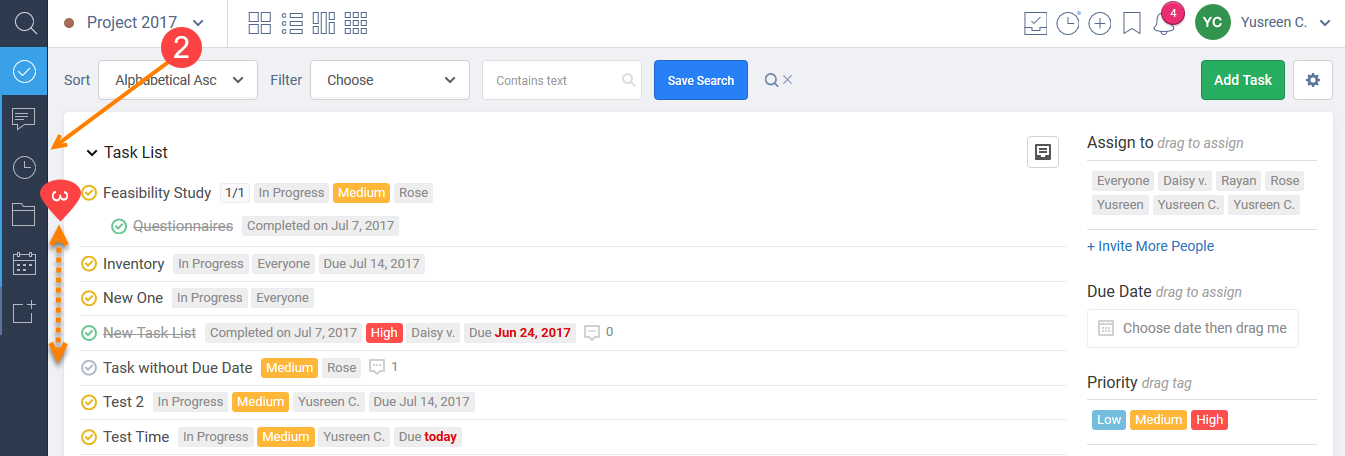
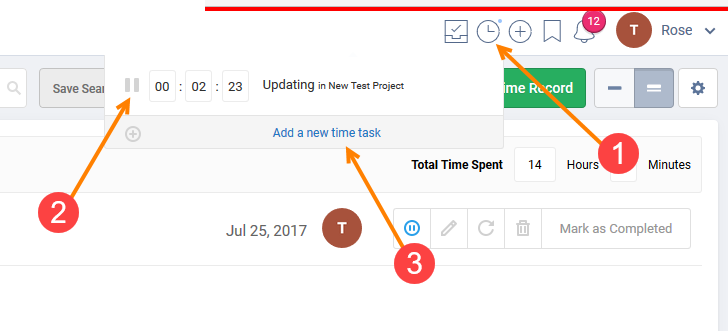
Start / Stop a Timer Using Timer Header
You will be able to start/stop a timer or start a new timer anytime by clicking on the Timer header (1), click on the stop/pause button (2) and add a new time task (3):
Time status inside a project
You can view a timer which has been started and is on-going inside a project by looking at the timer which will be blinking at the top of the page:
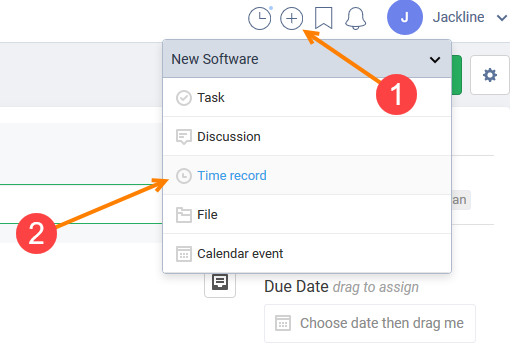
Quick add timer
You can start a time record anytime via the Quick Add button (1) and start a timer (2):
Sort by and Filter by
On your Time’s page, you will be able to:
1. Sort by (1) your Time Records by:
- Time Spent
- Alphabetical Order
- Date
- Status
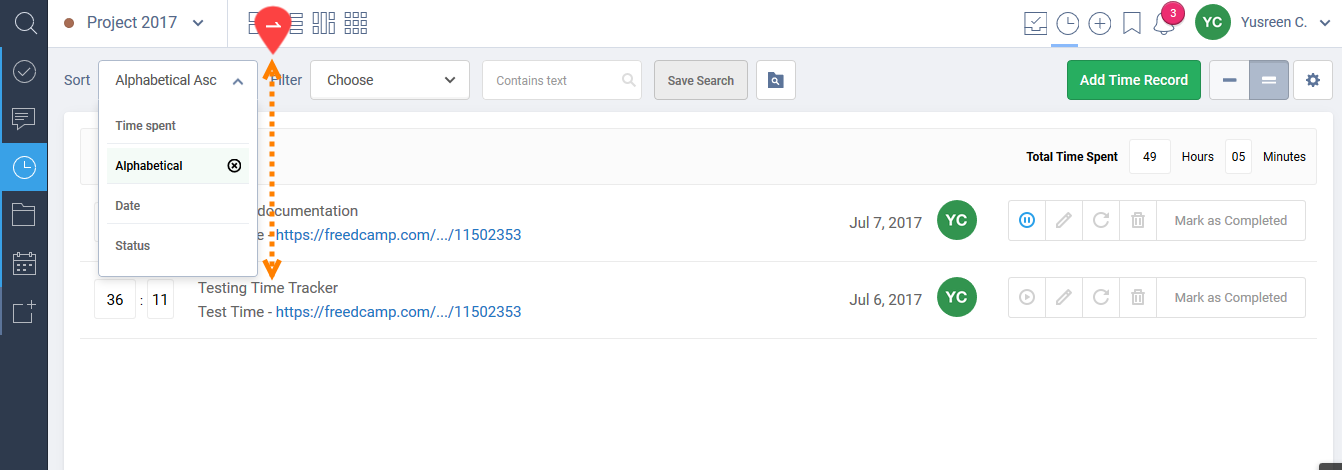
2. Filter by (2) your tasks by:
- User assigned to
- Status
- Time
- Date Created
- Date

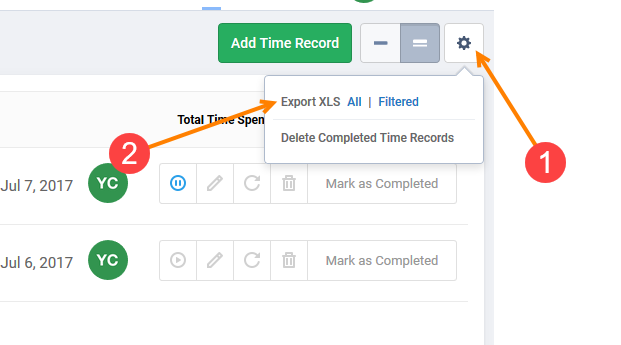
Export to XLS
From a Project
You can export your list of Time Records to XLS by clicking on the cogwheel icon (1) and click on either “All” or “filtered” for Export XLS (2):
From the Task Board
You have also the possibility of exporting time records across all projects from the Task Board - click on the cogwheel icon (1) and select 'Export Time Records'.
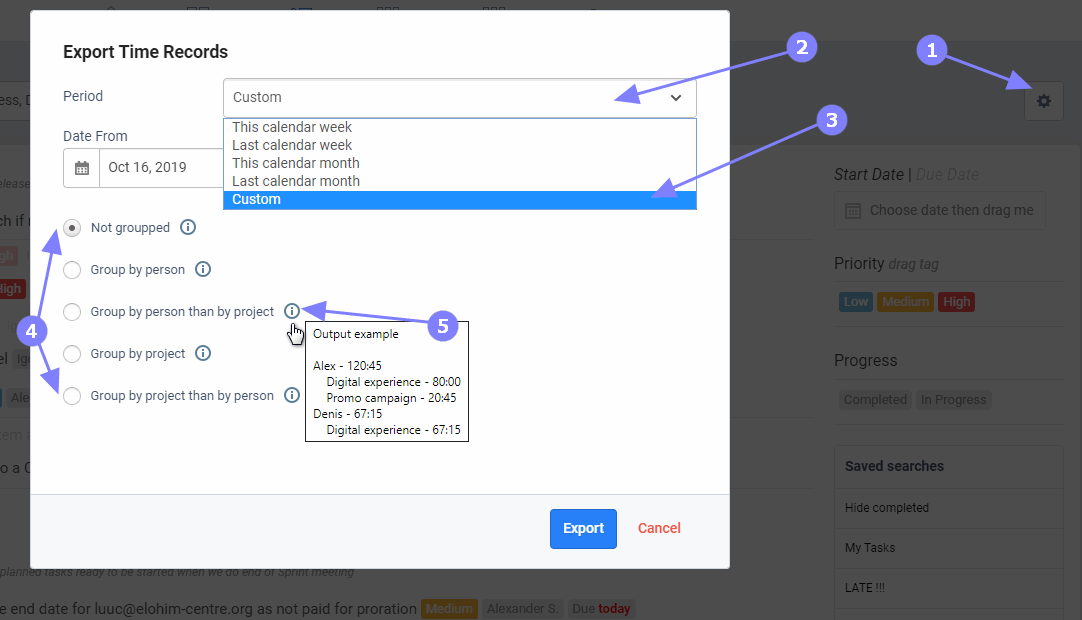
Time entries can be exported in five different ways (4). You can use predefined (2) and custom dates selection (3) as well as hints (5) for each format.
Import XLS
The settings menu in a project's time application also offers an Import XLS option, using the same template as our export. This can be used to transfer time entries from one project to another, or to manually create time entries and upload them to your projects.
How to link Tasks with Time Tracking
When you create a new time entry, you can see a set of check-boxes with all tasks assigned to you (or ‘everyone’), which are ‘In Progress’ or were completed today.
Please see below the animated GIF file for more details.
When you go to your Time Tracking app page in the specific project, you will see that the Time Record has been linked to a Task. The Task’s details have been specified as per below:
Link more than one task with Time Tracking
You can link more than one task when adding a time record by checking other boxes next to the linked tasks:
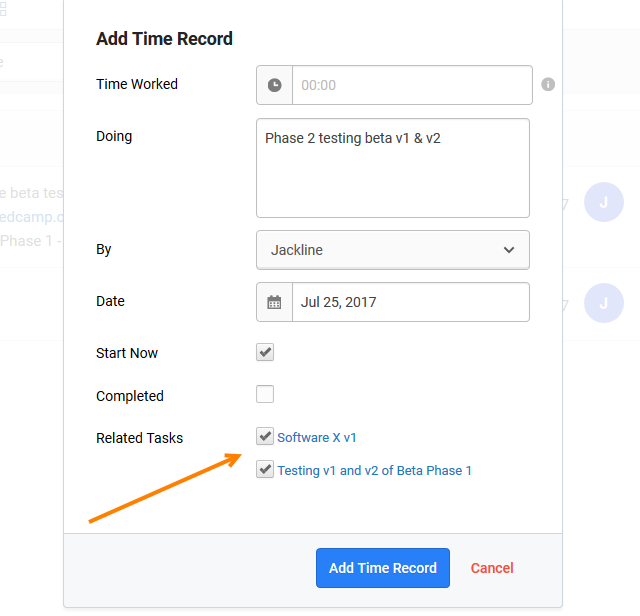
Please note that when you create a new time entry, you will also see a set of check-boxes with all tasks assigned to you (or ‘everyone’), which are ‘In Progress’ or were completed today.
How to link Invoices with Time Tracking
Linking Invoices with Time Tracking app is straightforward. When you create an Invoice (1), make sure you click on the “add” button of the time tasks (2):
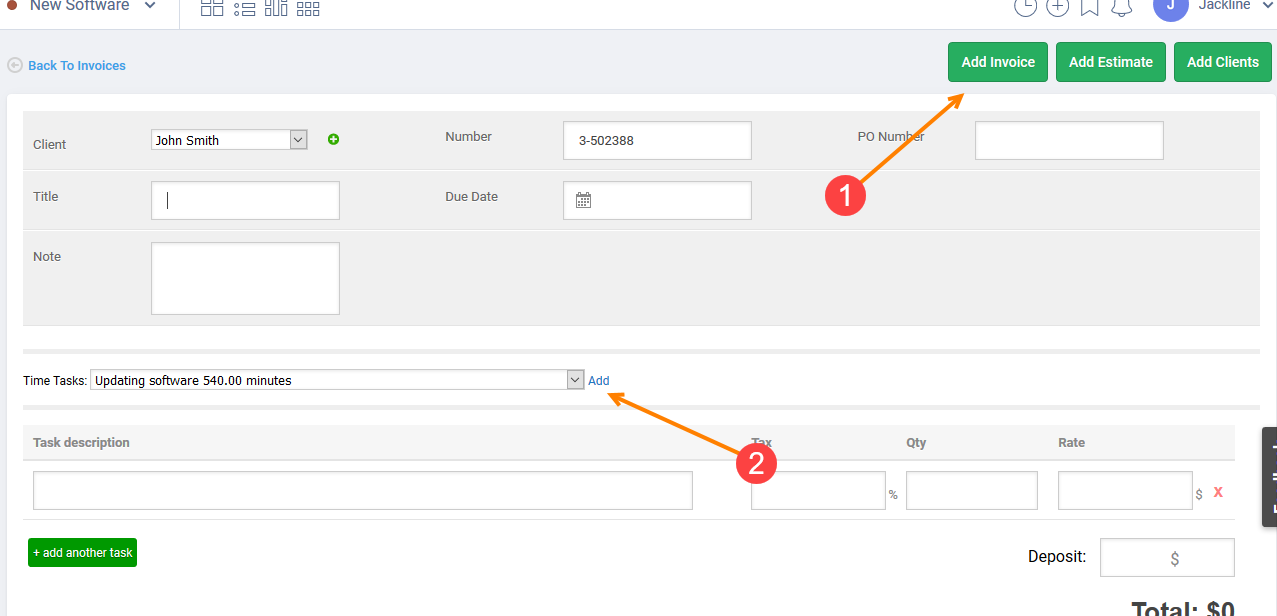
Only not completed tasks will be pulled from all projects in a project group. Once time records are billed you can mark them as 'Complete' in Time tracking application.
Future Improvements
This is a list of things we plan to improve:
- user can run only one timer at a time across all projects
- reminder for time tracking if not stopped after 8 hours
- each chunk of time record will be recorded separately as a start date/time and end date/time
- tasks will be exposed to Time app to allow to track time on tasks
- add a new attribute in Tasks called 'Estimate' if Tasks and Time are used in a project together
- allow to pull time records by a person, project, task/time record completion status with better granularity (for example from this date to that date).
- ability to see billed and not billed time inside Time application when used with Invoices+ app.
Yoг can leave leave your feedback and request some improvements here.