Discussions
Introduction
Using email for your team can be a nightmare sometimes. Discussions are a superior way to communicate, especially when you need to bring someone new up to speed.
Most people, including Freedcamp's team, use Discussions to communicate about topics that aren't directly related to a single task. For example, we share interesting articles, ask questions, or start brainstorming. Instead of polluting real Tasks with questions like 'It would be nice ...' or 'What if we ...' - we simply use a Discussion.
Many of our users work with their clients in Freedcamp. Their best practice is to restrict clients' access to Tasks and let them participate in Discussions.
What Discussions can do?
- Private discussions
- Organize discussions into lists and move topics between them
- Inline images and attachments in topics and comments
- Keep important discussions on top by making them sticky
- Archive completed discussion lists - handy in long lasting projects
- You can share and link to a discussion or a comment - it help a lot when you want to share your post in a long thread
- You can share topics you are interested in and subscribe other people to get their attention
- Discussions are searchable along with Tasks - no need to remember where the conversation happened
Please also check our Add-ons for more information.
Adding/Removing the Discussions Add-on
By default when you create a project, the Discussions add-on is already installed together with Tasks, Calendar and Files. If you'd like to remove this add-on or manage which users have access to it, please see this documentation article.
Discussions
Creating a Discussion
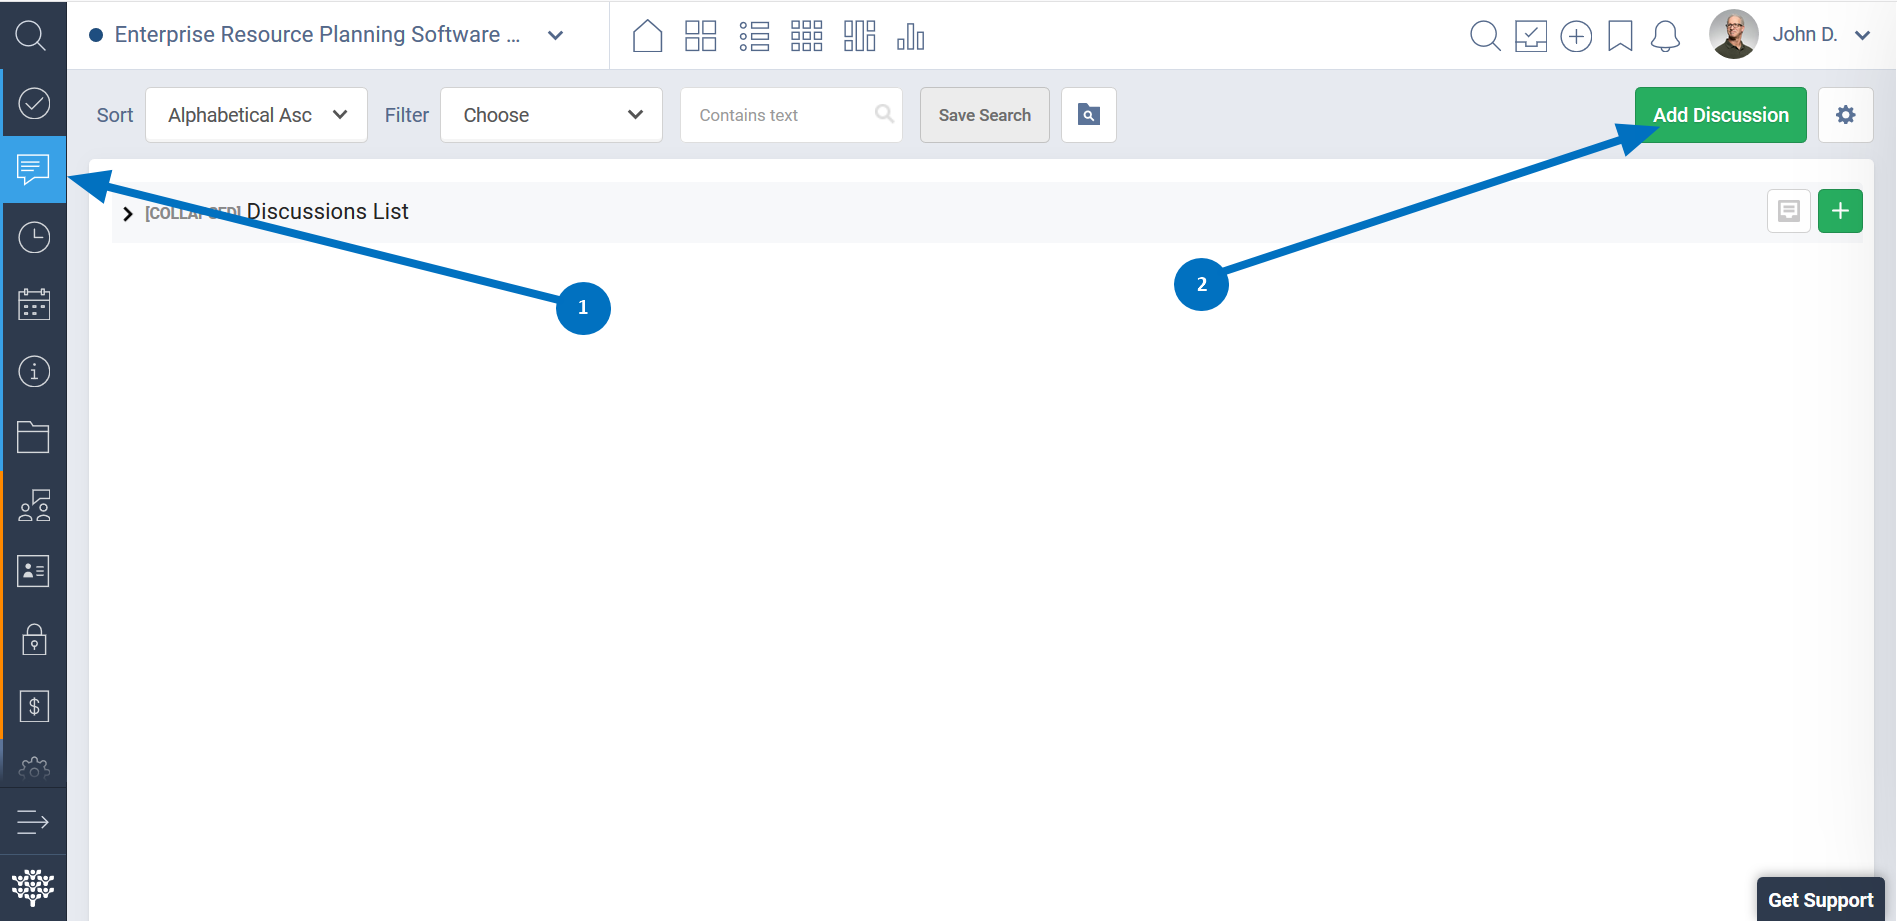
To create a discussion go to your project's Discussions page(1), then click the green Add Discussions button(2).
Private Discussions and Sticky Discussions
Aside from regular discussions, Freedcamp also allows you to make some discussions private or sticky. You can do this when creating or editing a discussion.
Private Discussions
A private discussion is only visible to its creator, the owner of the project, and the people it was shared with. The project owner can not be removed from a private discussion.
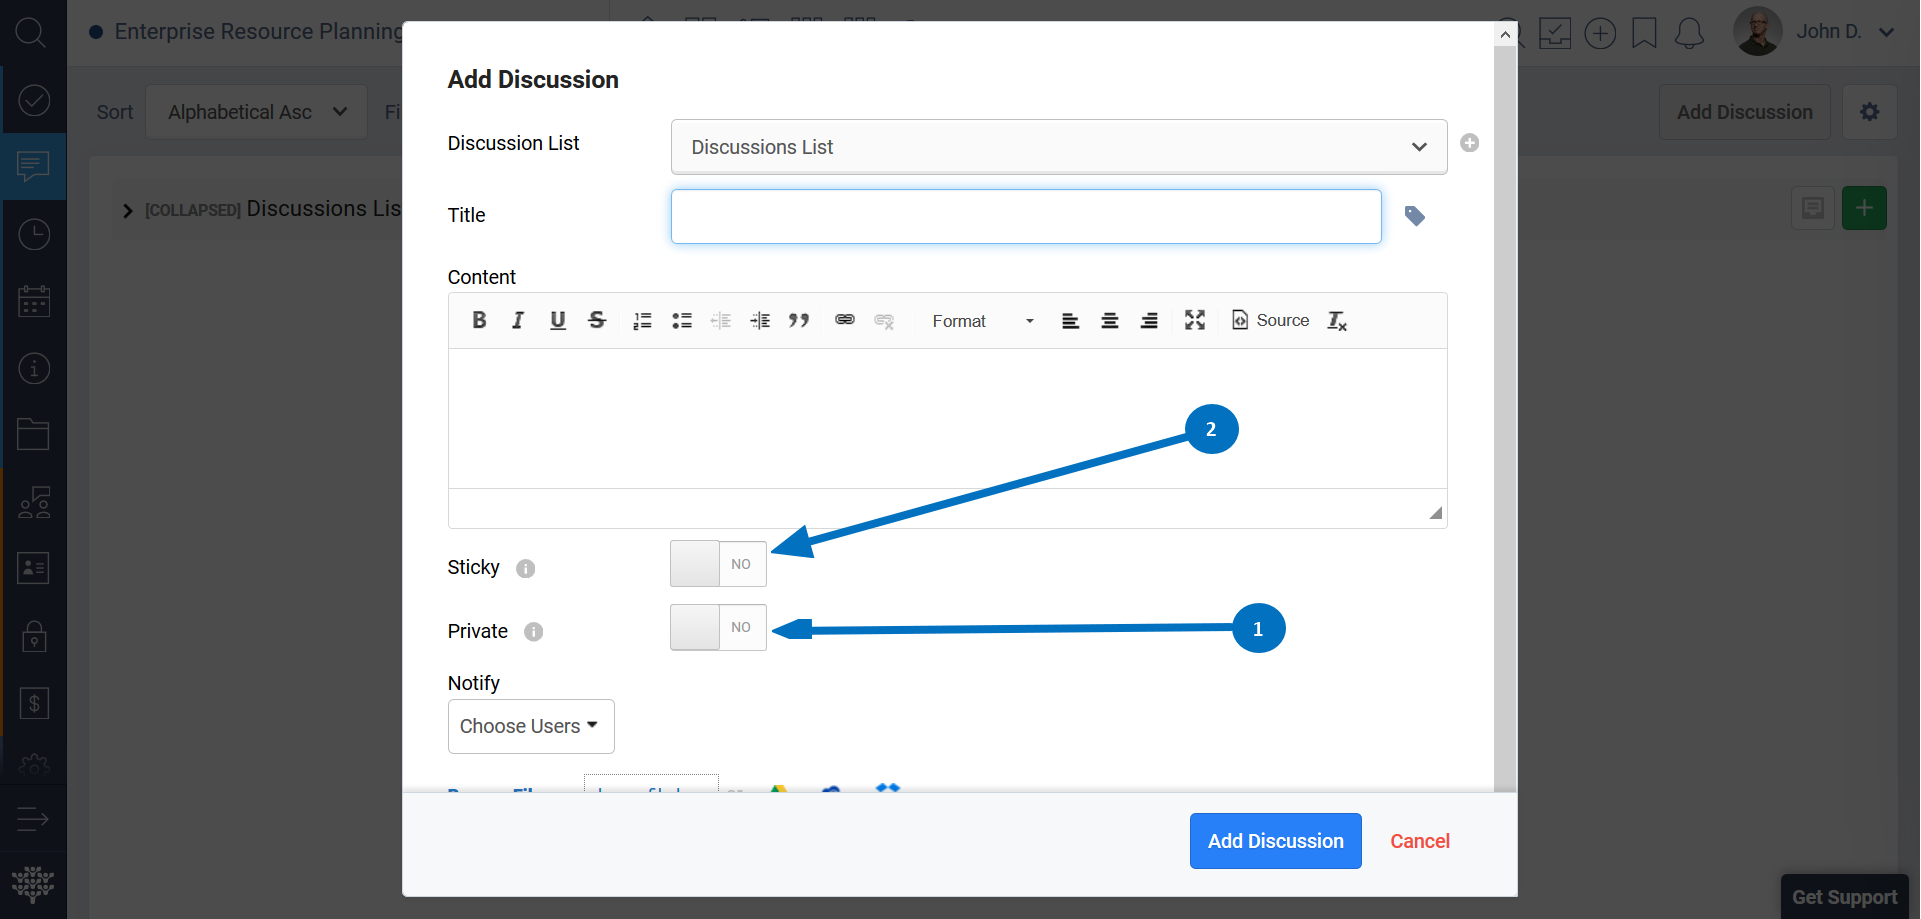
You can make a discussion private by switching the Private button(1) on the form from OFF to ON, as shown in the image above. The title will be hidden as well.
Sticky Discussions
Sticky discussions allow you to change the order of a Discussion and place it to the top, independent of the sort options: Alphabetical, Date Created or Last Activity.
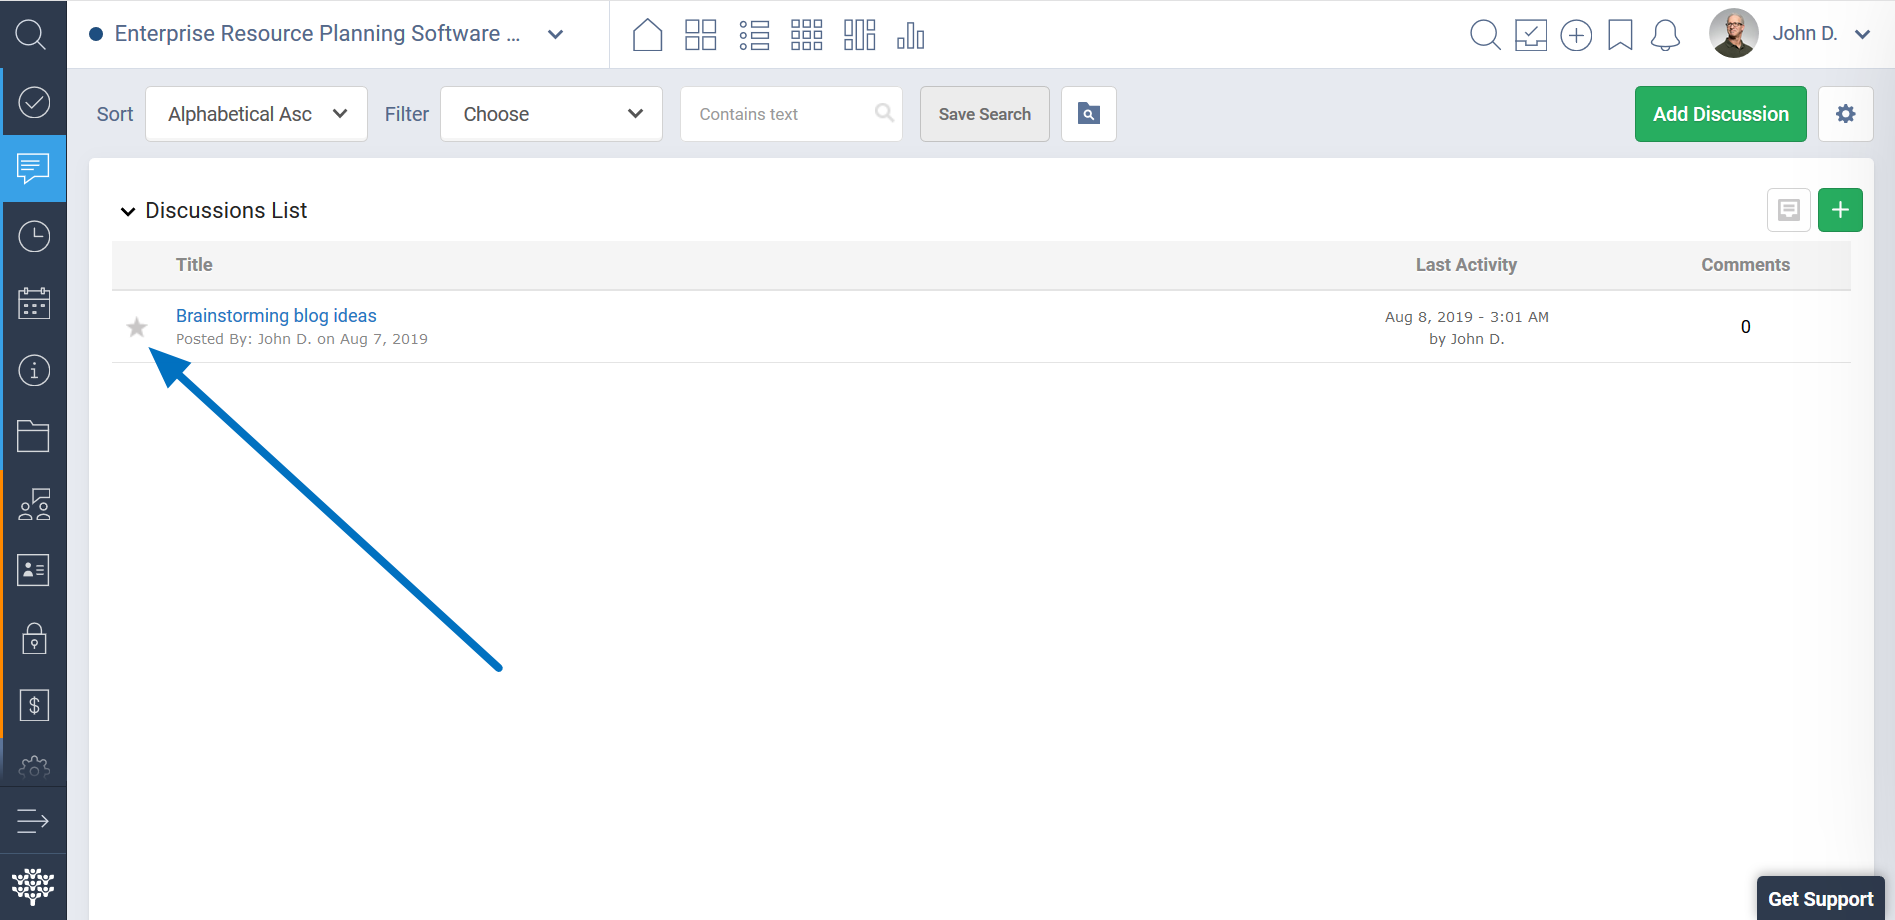
To make a discussion sticky, click the Sticky button(2) on the form from like in the image above. You can also go to your discussion list and click the star icon in front of a discussion.
Discussion List
Lists allow you to organize your discussions better. You have to select a list for your discussion when creating it, but you can always edit it to move it to a different list.
To collapse or expand a discussion list, simply click the arrow next to its name.
Managing Discussion Lists
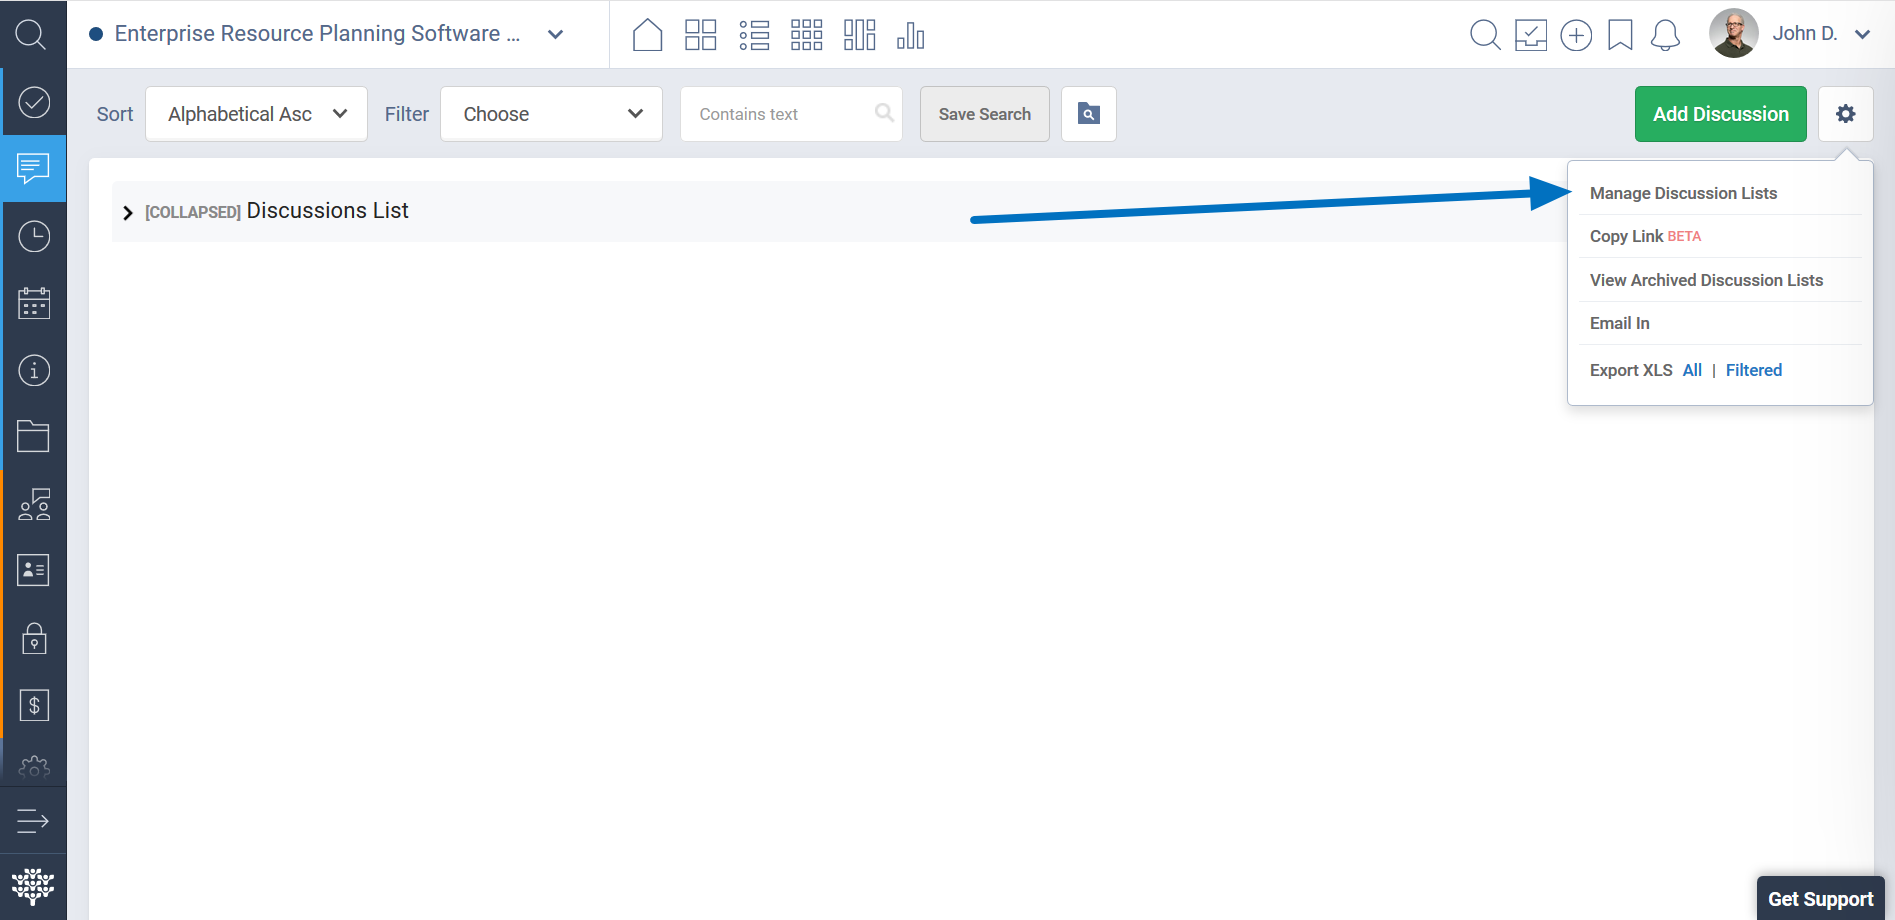
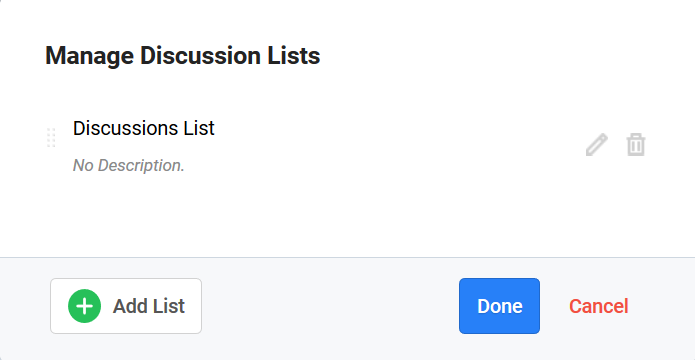
To create and edit discussion lists, click the settings icon at the top-right of your Discussions page and select "Manage Discussion Lists."
You will then have the option to add new lists, or edit and delete existing ones.
Archive Discussion Lists
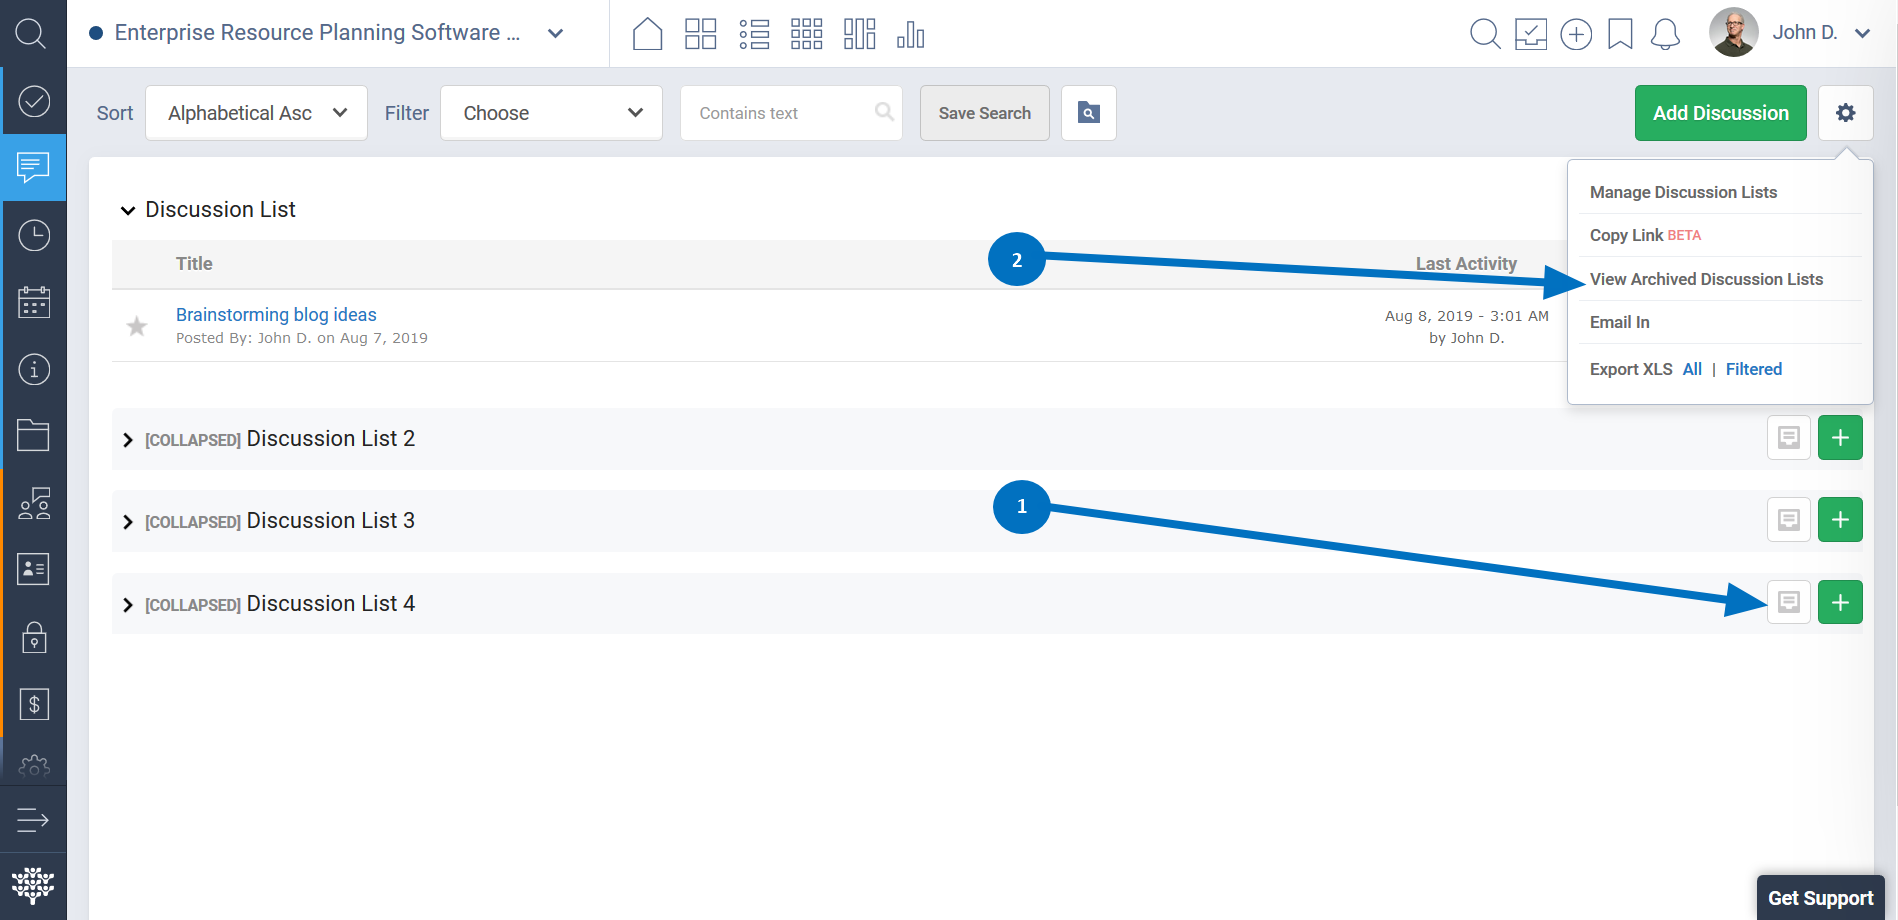
You can archive your discussion list by simply clicking on the first icon(1) next to its name. The list will then dissapear from your Discussions page.
To see all of your archived lists, click the settings icon in the top-right of the page and select View Archived Discussions List. You will then be able to unarchive a list by clicking the icon next to its name(the same one you did when archiving).
Additional Features
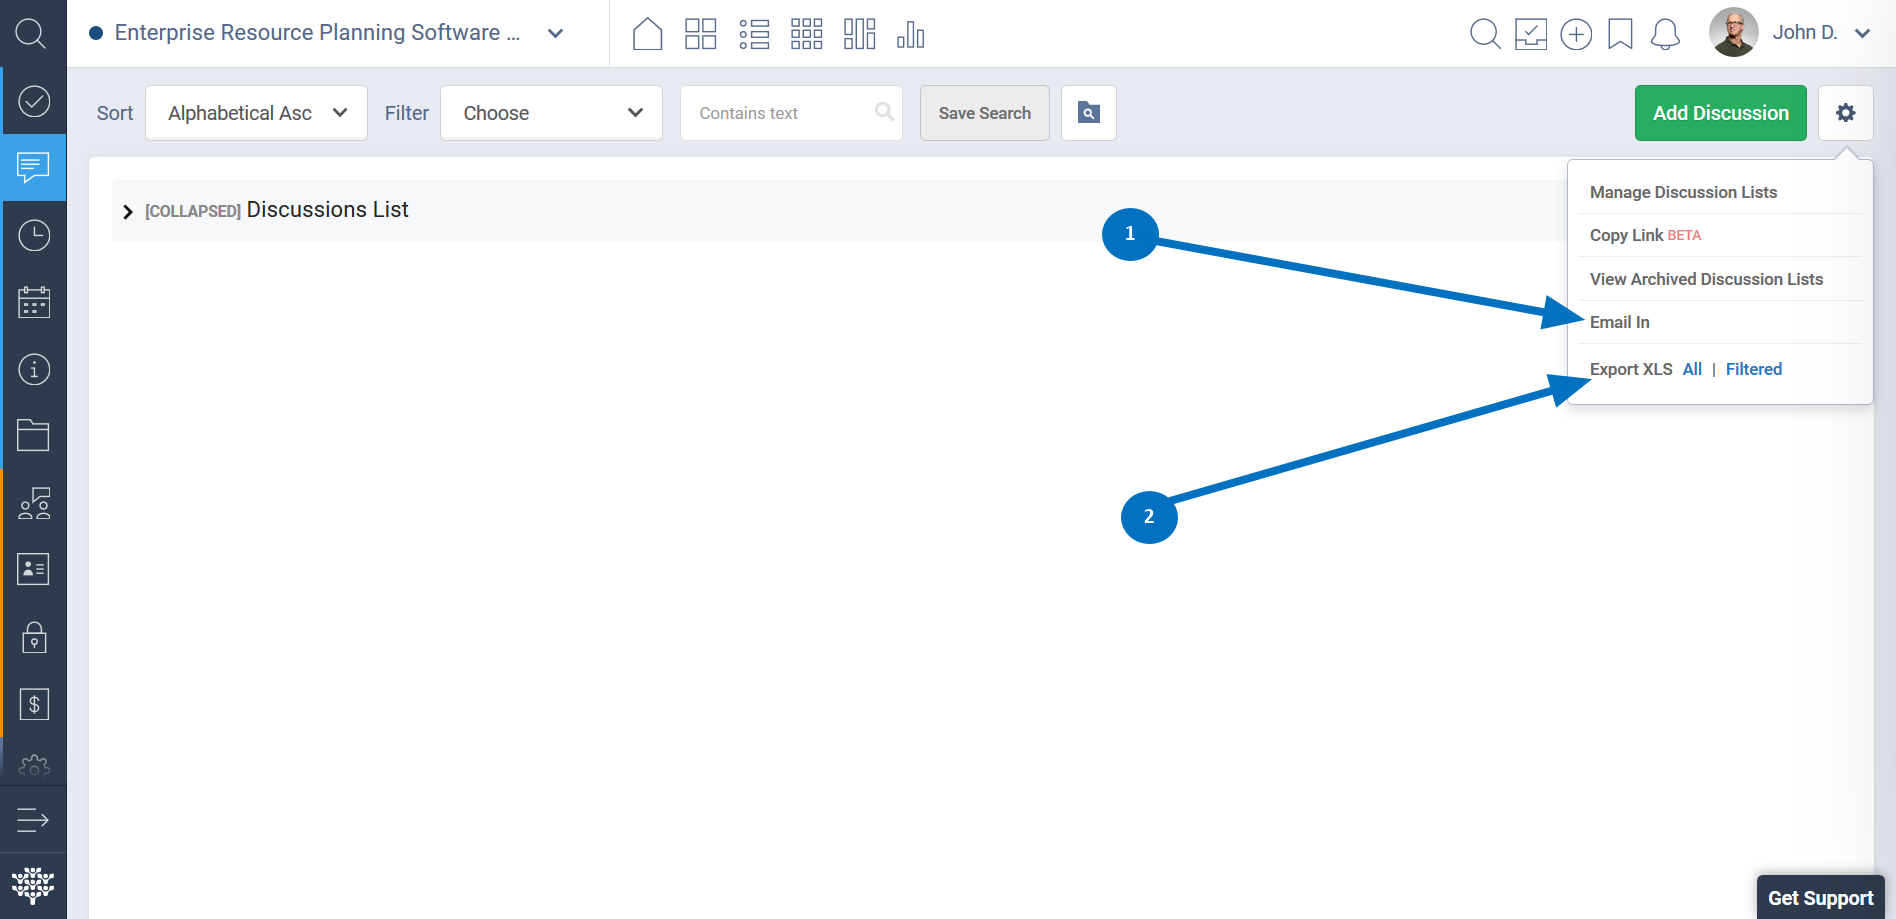
(1)Email-in
If you are subscribed to the Minimalist Plan and above, you will be able to use our Email in Feature to email into Freedcamp and create your discussion.
(2)Export XLS
You can export your discussions by clicking the gear icon in the top-right of the page and selecting Export XLS.